Food52's Test Kitchen Manager Erin McDowell is here with tips and tricks to help you master the most essential desserts and the simplest breads.
Today: Not only can you—yes, you!—conquer the traditional lattice-top crust, but you can also go above and beyond with 7 fun variations.
One memory always comes to mind when I make a lattice crust pie. I’m in my grandma’s kitchen, and it’s summer. We’re cranking the air conditioning to battle the nearly deadly combination of Kansas mid-July heat and an oven temperature of 425° F. We’re huddled around her tiny kitchen island (which is crooked and rolls a little every time we shift pressure) and we’re making pies.
This was not an unusual scene for my grandma and me. Indeed, once I arrived early in the morning to spend the day with her, and after sitting politely across the table from one another exchanging pleasantries for what felt like no time at all, we both got restless. She looked at me and said, “I feel like we need pie. Or bread. Or both!”—and a tradition began. My grandma and I baked pies together. Sometimes, it was to accompany her killer pan-fried chicken and twice-baked potatoes. Sometimes it was gift to someone (who would hopefully share). And sometimes, it was to eat in between rounds of poker, standing at the kitchen counter, eating right out of the pie plate.
But the one thing my grandma wouldn’t make (at least not with any regularity or without an extremely special occasion in mind) was a lattice crust. That hot July day as we took turns rolling out dough, she told me that it was altogether “too fussy.” Her pies were lovely, but far from pristine, and I guess she feared that a lattice would interrupt their naturally rustic good looks and take a turn for the worse.
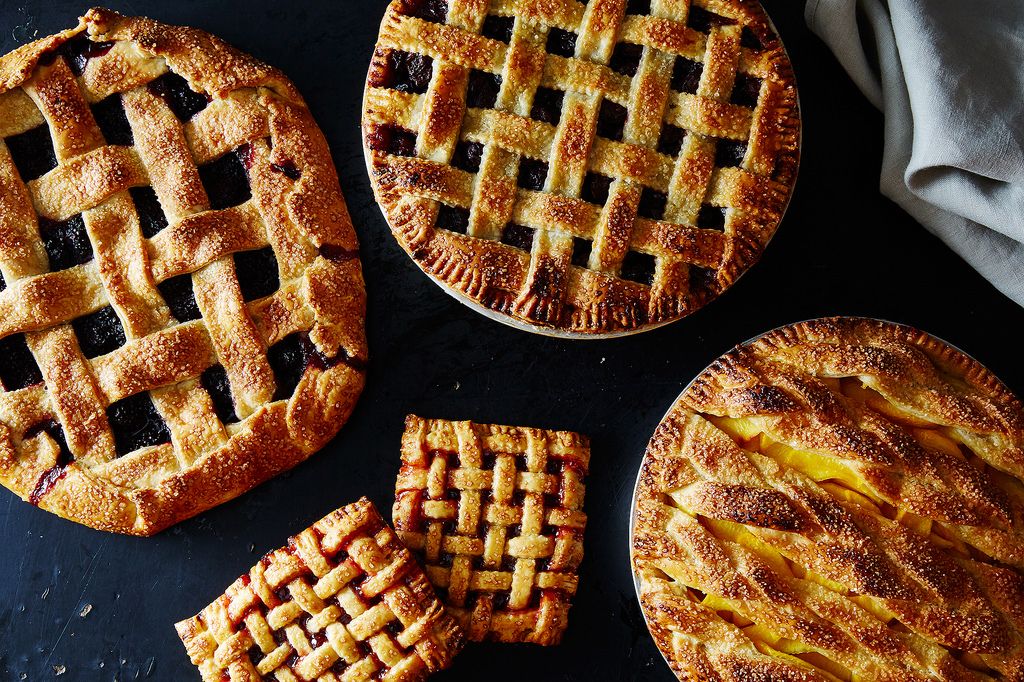
But I am here now to shout from the rooftops that lattice is attainable—whether you’re aiming for perfectly imperfect or borderline pristine. Sometimes, it’s about finding the variety that’s right for both your style and the type of pie you're making.
Read the general guidelines, then either learn to master the traditional lattice, or try a new variation:
- Super skinny lattice
- Fat lattice
- Random lattice
- Lattice on a galette
- Lattice on hand pies
- Braided lattice
- Tightly-woven lattice
- Roll out your pie dough to 1/8-inch thick unless otherwise specified. Be sure to brush any excess flour away after you’ve finished rolling.
- Use a straightedge. Whether you’re trying to be super perfect or not, a ruler or even a spatula handle can help you maintain straight, even lines. If you’re a fan of eyeballing (I hear you!), just be careful when you cut the first strip, then use that strip as a guide for the remaining pieces.
- Cut more, rather than fewer, pieces. I could give incredibly detailed guidelines as to how many strips of pie dough you’ll need for your lattice (and I do give approximations below), but it will vary based on the size of your pie plate, the amount of filling you used, and your personal preferences for look and style. So use my suggestions as guidelines only!
- It's ideal to have each piece be the length of diameter of your pie plate (usually 9, 10, or 12 inches), but remember that it’s ok for some pieces to be shorter—just use those at the edges.
- Rotate the pan as you work. Don’t make things harder on yourself: Move the pie plate or baking sheet while you work. I lay down the strips horizontally, then rotate the pan 90 degrees before I begin to weave the lattice. From this point, I work halfway across the pie, then turn it 180 degrees to do the other half (see the video). This way, I’m not pulling the placed pieces too far, which can lead to cracking or even breakage– and less handling is always better. The less you touch everything, the cooler the pastry stays.
-
Chill the pie after weaving. This is especially important in the heat of summer. Pop it in the fridge for 20 to 30 minutes or the freezer for 10 to 15 before you throw it in the oven. A cold lattice bakes best!
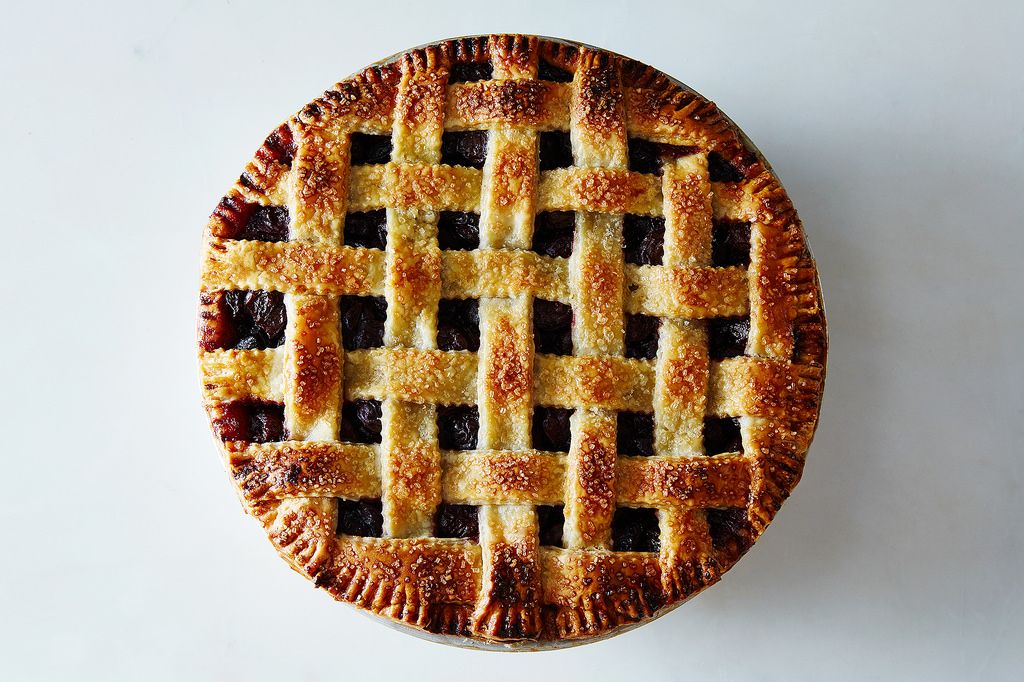
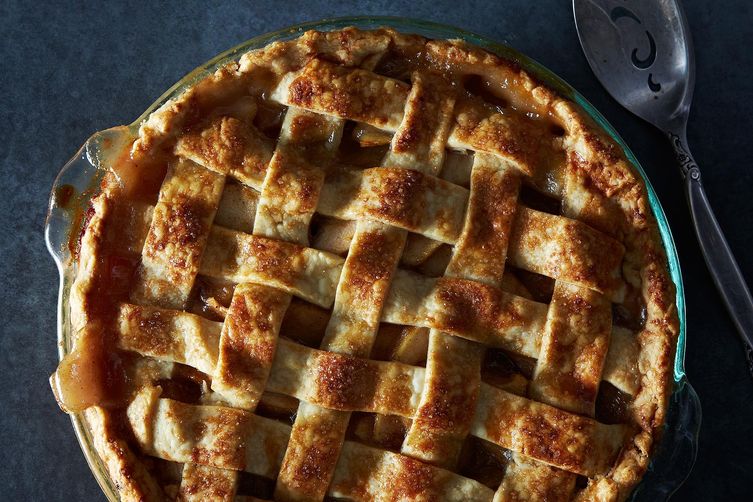
Practicing the good ol’ traditional lattice is a great way to learn. It's made from medium-sized strips, often cut with a scalloped pastry wheel to make a ruffled edge (though straight edges work too). The strips are woven together with space left between them to make little square shapes where the filling can bubble through.
To make a traditional lattice:
- Cut about twelve 1 inch-wide strips from your rolled-out pie dough using a pastry wheel and a straightedge.
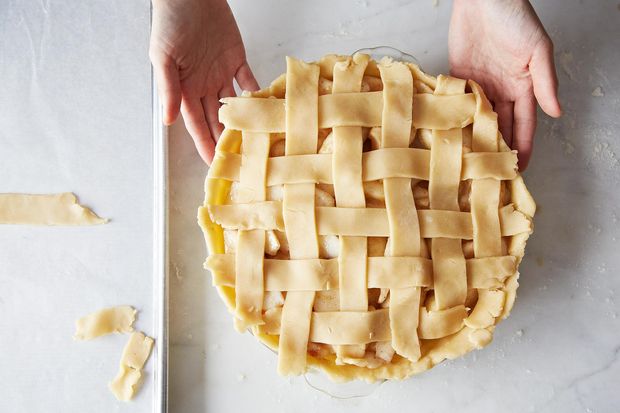
- Lay half of the strips, evenly spaced (about 1/2-inch in between each), across the pie vertically. Once all the pieces are placed, rotate the pie 90 degrees so that the strips are running horizontally.
- Pull the top strip back halfway across the pie. Skip the next piece, then fold back the following piece. Repeat until every other piece is folded back. Now place a lattice strip vertically in the center of the pie. Fold the horizontal pieces you pulled back down over this strip. (The new vertical strip will be under the pieces you folded back, and over the pieces you left in place.)
- Repeat the process, this time pulling the strips you did not move the first time. Again, pull every other strip back and place a lattice strip vertically, spaced about 1/2 inch from the vertical strip next to it. Fold the horizontal pieces you pulled back down over this strip.
- Continue until you’ve made it all the way across one half of the pie. Now rotate the pie 180 degrees and repeat the process on the other side.
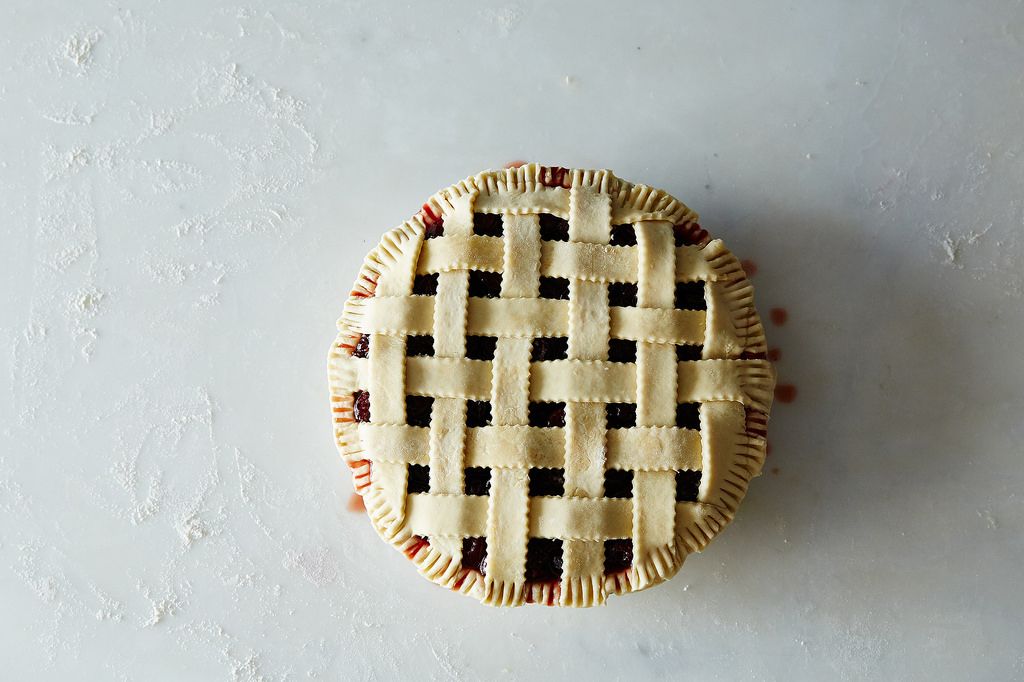
- Trim away excess lattice and/or fold it under the edge of the bottom crust. Crimp as desired and chill before baking.
This lattice is adorable but is a bit of a test of your patience, as it will take almost twice as long to weave as a traditional lattice. Other than that, it’s no harder! Remember to keep your lattice strips nice and cold—warm strips will be harder to manipulate and can cause you some grief. Basically, the concept is identical to the traditional lattice steps, except you’re working with much smaller pieces:
- Cut about thirty 1/8 inch-wide strips from your rolled out pie dough using a pastry wheel and a straightedge.
- Lay half of the strips, evenly spaced (about 1/8 to 1/4 inch in between each), across the pie vertically. Once all the pieces are placed, rotate the pie 90 degrees so that the strips are running horizontally.
- Now repeat the same process as you would for a traditional lattice. Once all of the strips are woven, crimp as desired and chill before baking.
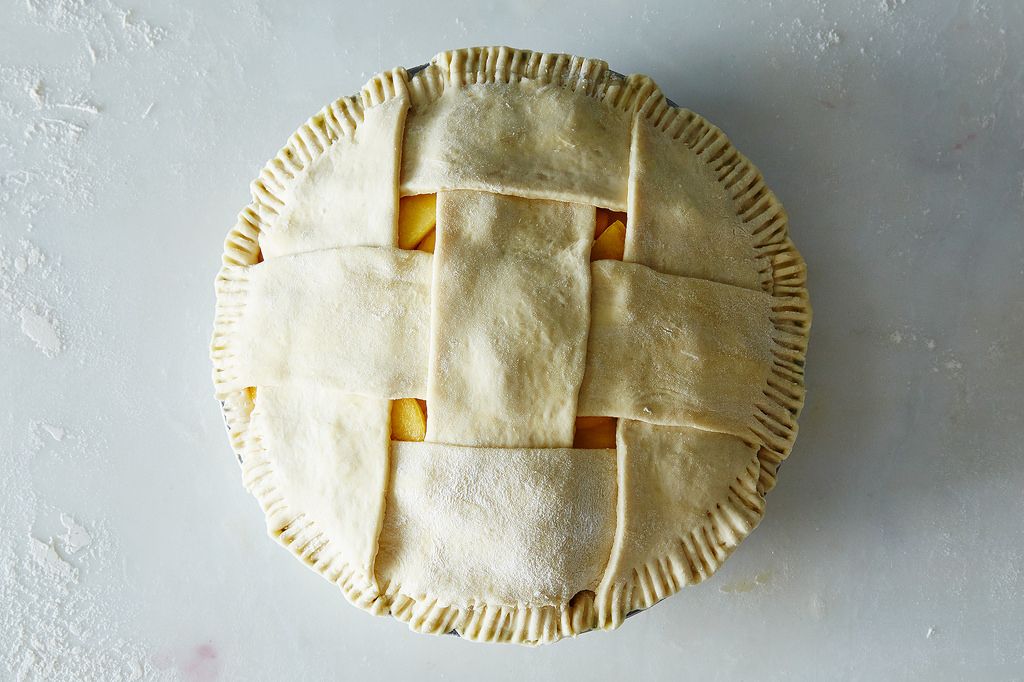
This is my favorite lattice and is especially awesome for beginners. I affectionately call fat lattice “fattice,” and I adore it because it always looks good and the crust always gets nice and crisp (thinner lattices can naturally have some “wet” spots due to juices bubbling up, but fattice has more surface area for browning). It’s great for folks just starting out because there are fewer lattice strips and they are less fragile, which makes handling them easier. I love a super fat lattice (about 2 inch-wide strips), but you can do this same style with a lesser width easily. This style also works well with the tightly woven lattice look (below).
- Cut about six 2 inch-wide strips from your rolled out pie dough using a pastry wheel and a straightedge.
- Lay half of the strips, evenly spaced (about 1/4-inch in between each), across the pie vertically. Once all the pieces are placed, rotate the pie 90 degrees so that the strips are running horizontally.
- Now repeat the same process as you would for a traditional lattice. Once all of the strips are woven, crimp as desired and chill before baking
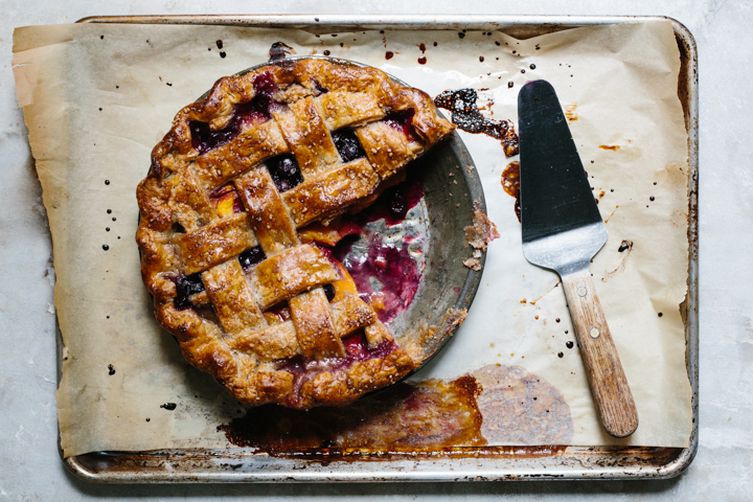
One of my favorite pie bakers does this style so effortlessly, and it’s always gorgeous. The first time I tried it I thought, “This is what everyone who is scared of lattice should do”. Cut the strips randomly—all different widths (it doesn’t even matter if they’re crooked) and arrange them in a random order on the pie using the same method as traditional lattice. I like to use a variety of widths ranging between 1/8-inch to 1 1/2 inches, and I find it looks best when the pieces are relatively tightly woven (not a lot of space between each). The finished pie looks super put-together and rustic at the same time. And since it’s random, there’s really no way to mess it up!
- Cut somewhere between 30 to 40 strips from your rolled out pie dough of varying widths using a pastry wheel and a straightedge.
- Lay half of the strips, evenly spaced (about 1/8 to 1/4 inch in between each), across the pie vertically. Once all the pieces are placed, rotate the pie 90 degrees so that the strips are running horizontally.
- Now repeat the same process as you would for a traditional lattice. Once all of the strips are woven, crimp as desired and chill before baking
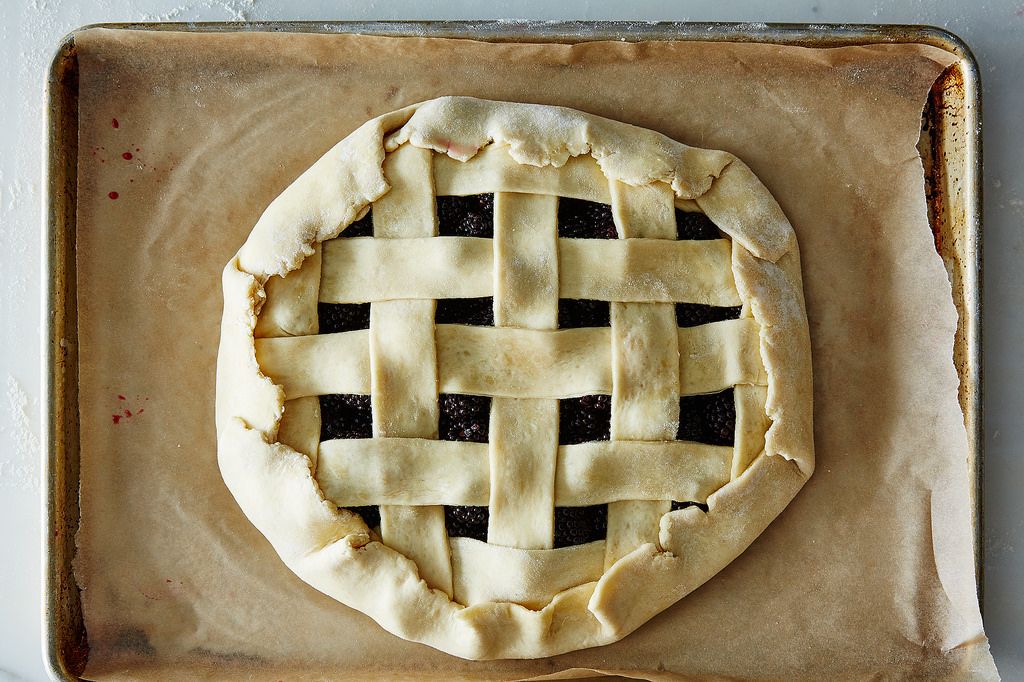
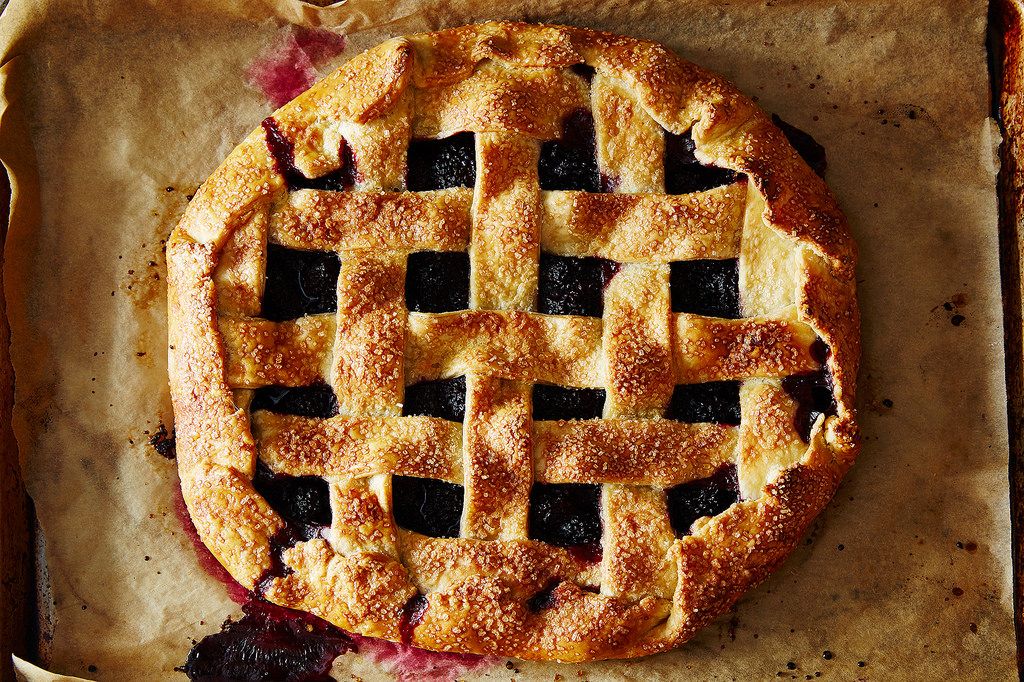
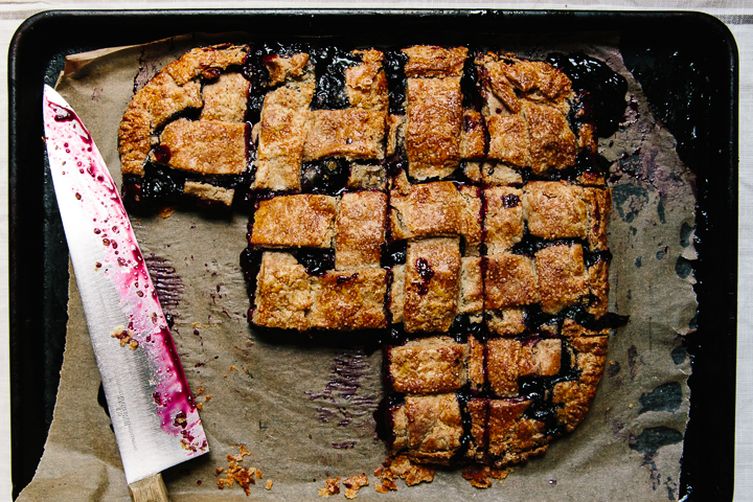
This is another type of lattice to try if you’re a little bit nervous about the process. It’s a tad easier because you don’t have to worry about the edges at all. When you’re done weaving, fold up the edges of the galette over the lattice and voilà: All done! Plus, it gets you crust-lovers even more crust on an already-crusty galette.
- Prepare your galette on a baking sheet, leaving a full 1-inch around the edges when you pile the fruit in the center.
- Cut about twelve 1 inch-wide strips from your rolled out pie dough using a pastry wheel and a straightedge.
- Lay half of the strips, evenly spaced (about 1/2-inch in between each), across the galette vertically. Once all the pieces are placed, rotate the baking sheet 90 degrees so that the strips are running horizontally.
- Finish layering the strips as you would for a traditional lattice.
- Trim away excess lattice (it should just pass the fruit filling on all sides), then fold the edges of the galette over, encasing the lattice and settling on the fruit filling. Chill before baking.
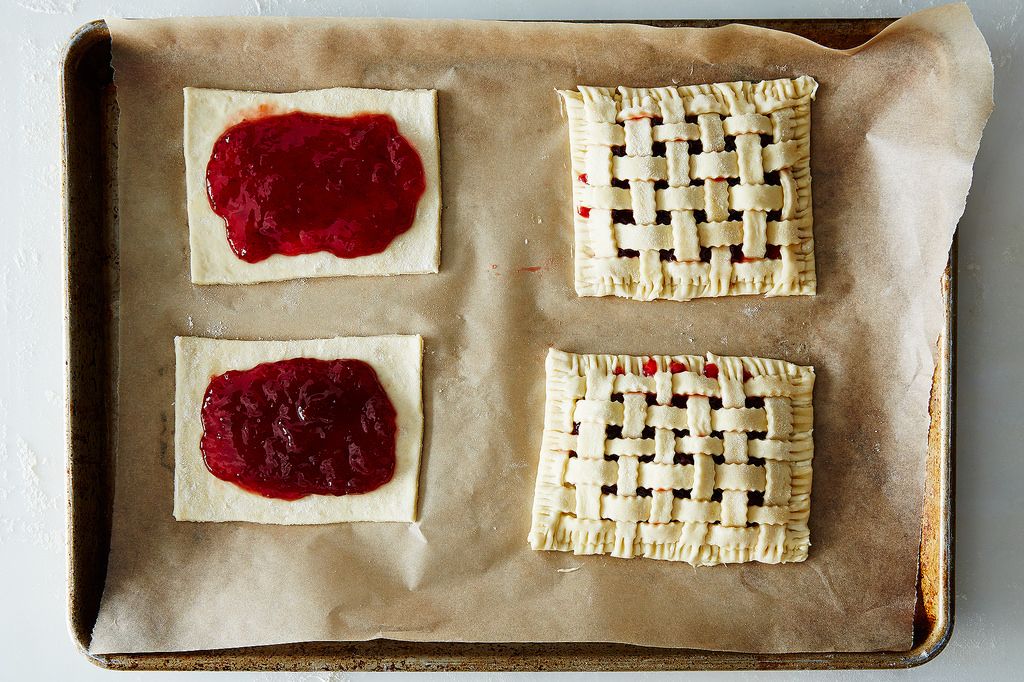
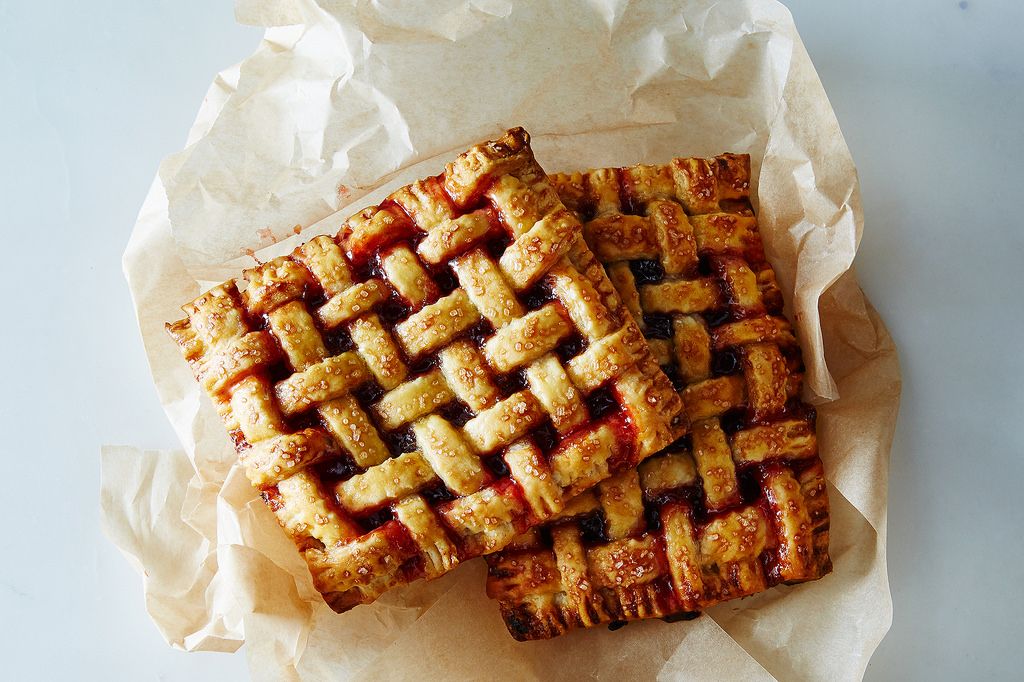
This is a new favorite of mine, and it requires a little bit of effort but the result is so darn cute. Bonus: These freeze very well (especially if you fill them with jam or preserves). If you go through all the effort on one day, you can keep these in the freezer and you’ll always be ready to shock someone with your amazing lattice abilities. Remember that your lattice strips need to be much shorter for this method, so you can cut them normally, then cut the whole batch in half with your pastry wheel.
- Prepare your hand pies as directed by recipe and place them on a baking sheet, leaving a full 1/2-inch around the edges when you pile the fruit or jam in the center.
- Cut about thirty to forty 1/4 inch-wide strips from your rolled out pie dough using a pastry wheel and a straightedge.
- Lay half of the strips, evenly spaced (about 1/8-inch in between each), across the hand pies vertically. Once all the pieces are placed, rotate the baking sheet 90 degrees so that the strips are running horizontally.
- Now repeat the same process as you would for a traditional lattice. Once all of the strips are woven, crimp as desired and chill before baking.
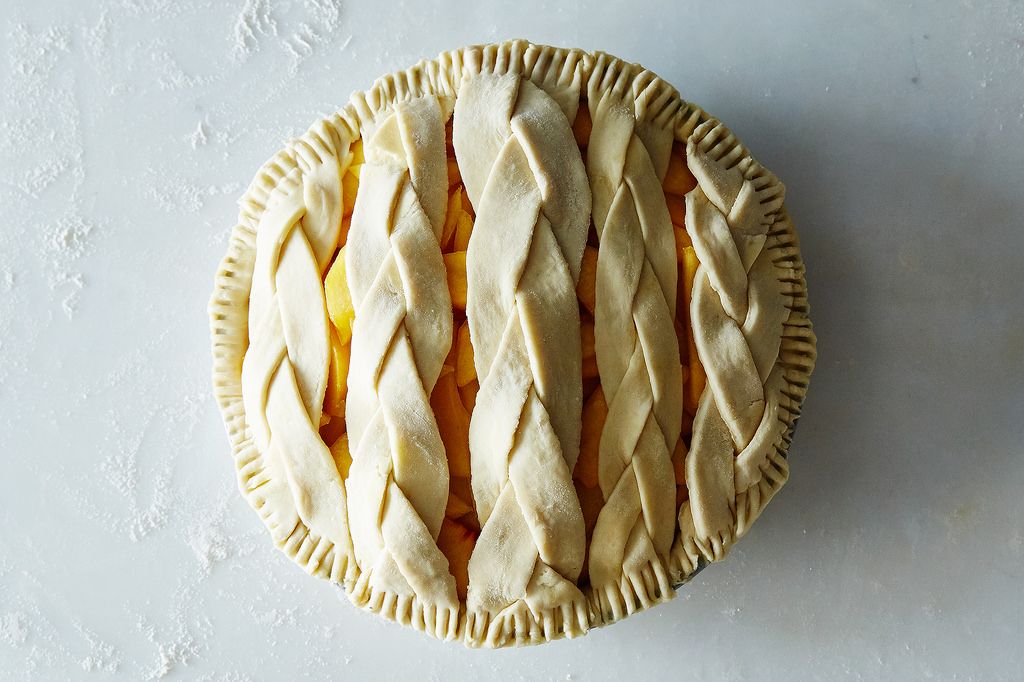
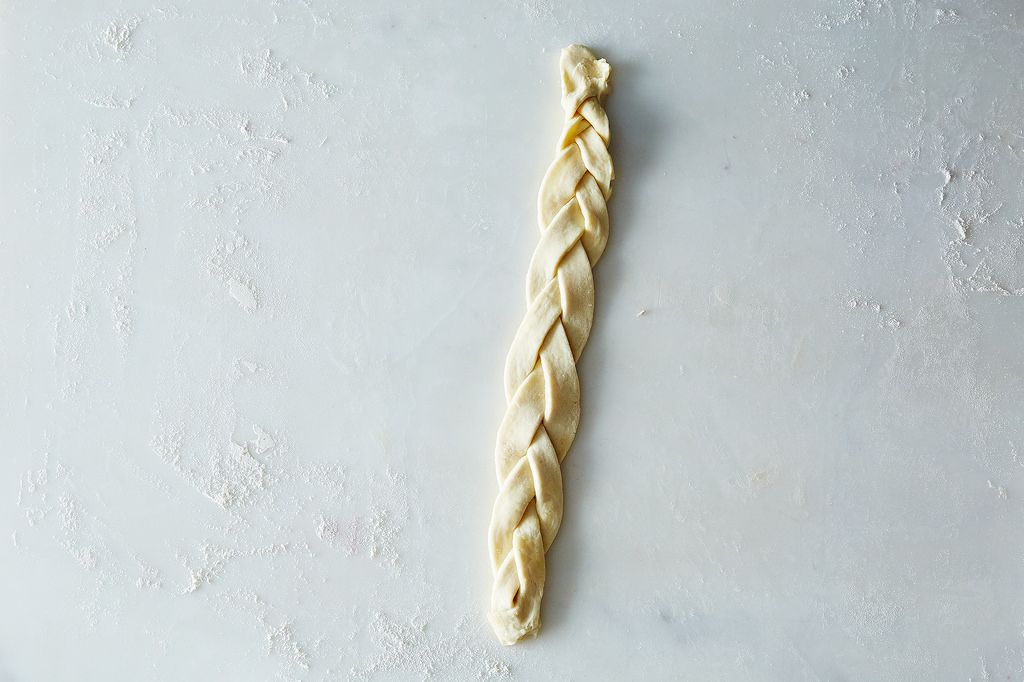
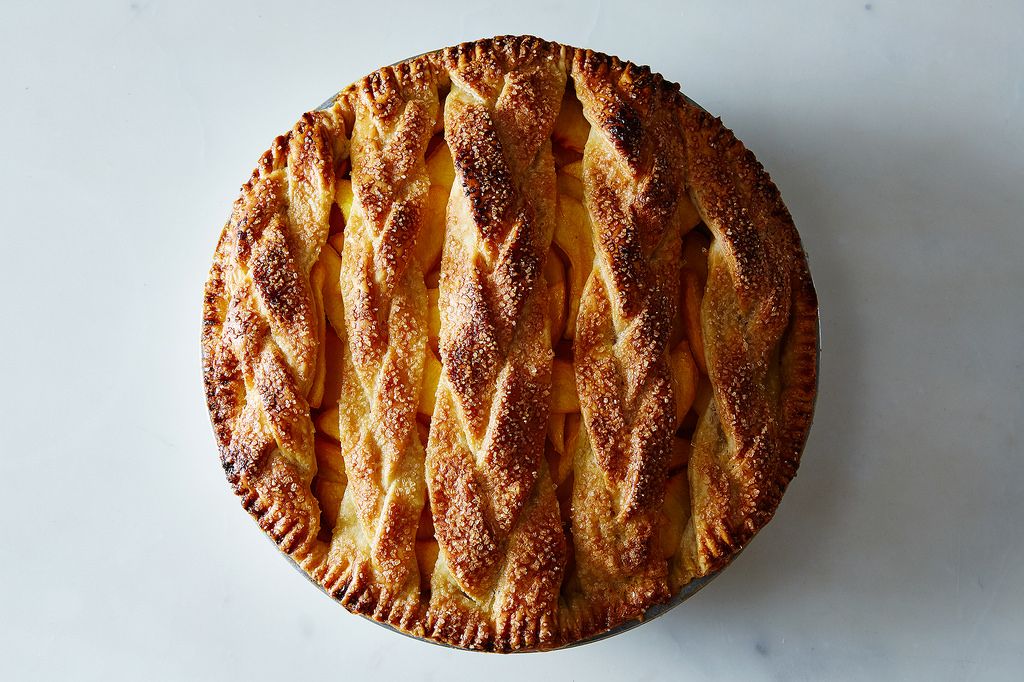
This is an especially great technique to do with scraps or leftovers from pies past, because if your dough is too flaky, the braids will not be as even after baking. I wrote about the braiding technique for edges of a pie, but for lattice, it’s great to make the strips a bit wider. Instead of weaving together multiple braided pieces (which can look a little bit messy), I like to just lay the braided strips across in one direction. Depending on how wide you make them, you’ll likely only need 3 to 5 braids!
- Cut about nine 1/2 inch-wide strips from your rolled out pie dough using a pastry wheel and a straightedge.
- Pinch three strips together at the top, and gently braid them (as you would hair). When you near the end of the braid, pinch the ends together. If there’s excess dough on either end, trim it away. (Note: If you’re a pro braider, you may want to try braiding from the center outwards—this makes a more even braid.)
- Repeat with the remaining strips until you have enough braided pieces to cover the pie when evenly spaced.
- Lay the braids across the pie, leaving about 3/4- to 1-inch in between each strip.
- Trim away excess lattice and/or fold it under the edge of the bottom crust. Crimp as desired and chill before baking.

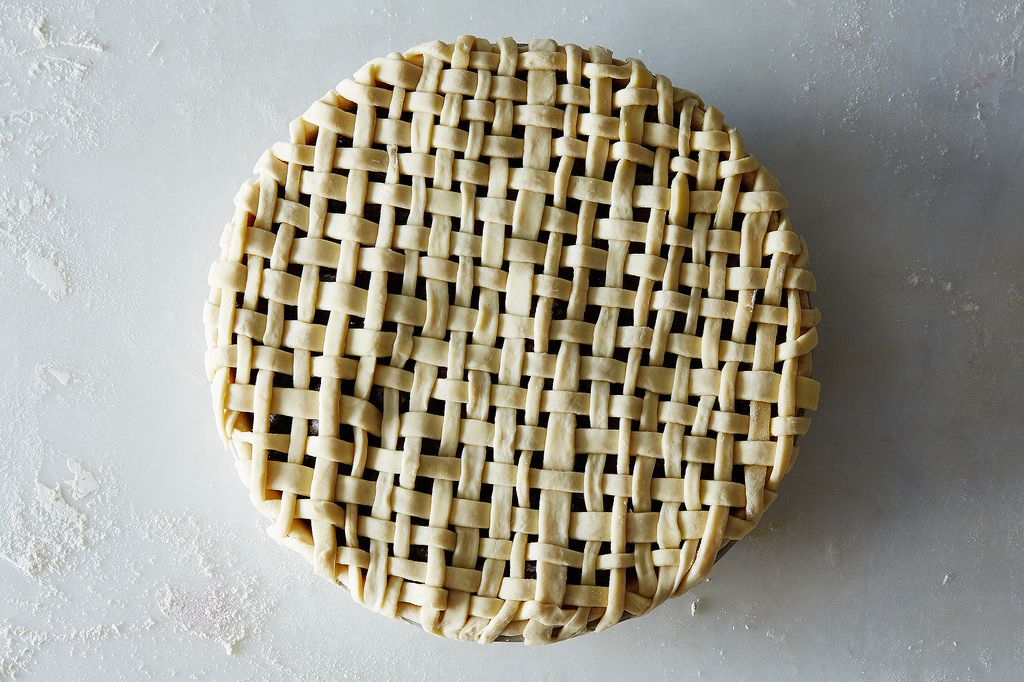
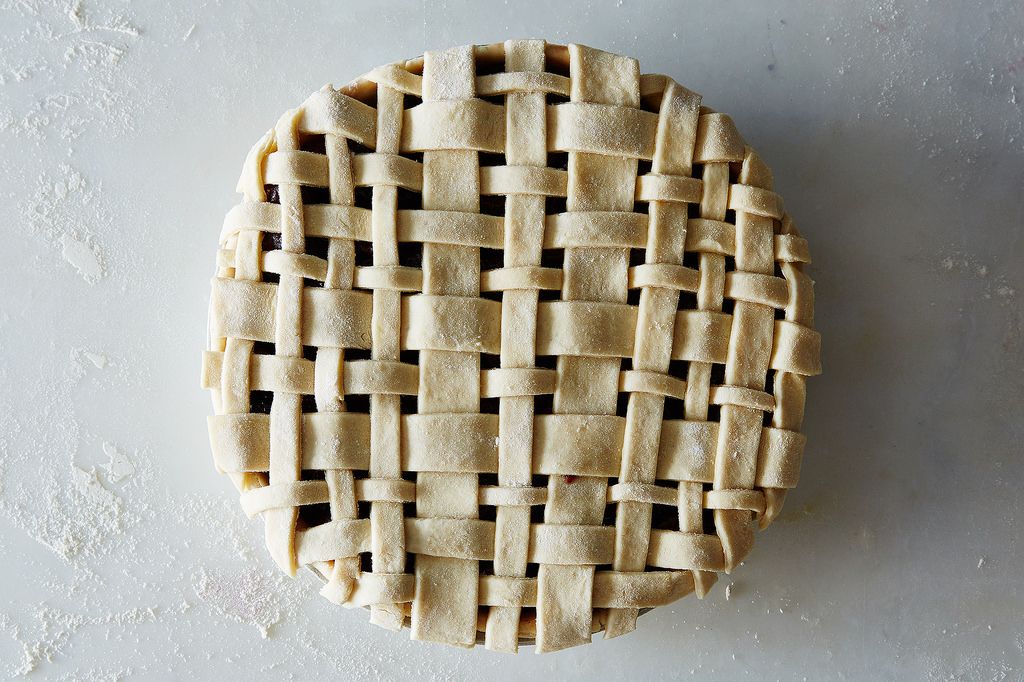
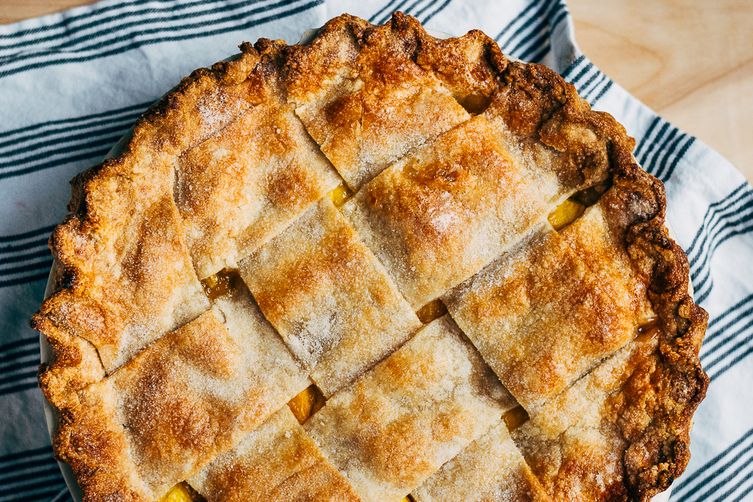
This lattice technique is increasingly popular and for a very good reason: It looks very put-together. If you want rustic, go one of the many routes above. If you want a nice, pretty, almost perfect pie, weave the lattice tight. This technique works with any width of lattice, but is easiest with traditional (1 inch) or fattice (2 inches); it works with skinnier strips, but is a little bit tougher to accomplish without a steady hand. Essentially, you weave the lattice so that there is almost no space between the strips. Steam can still escape from between the strips, so there’s no need to cut vents, but the finished look is very swanky.
- Cut about sixteen 1 1/2 inch-wide strips from your rolled out pie dough using a pastry wheel and a straightedge.
- Lay half of the strips, evenly spaced, nearly touching each other, across the pie vertically. Once all the pieces are placed, rotate the pie 90 degrees so that the strips are running horizontally.
- Now repeat the same process you would for a traditional lattice. Once all of the strips are woven, crimp as desired and chill before baking.
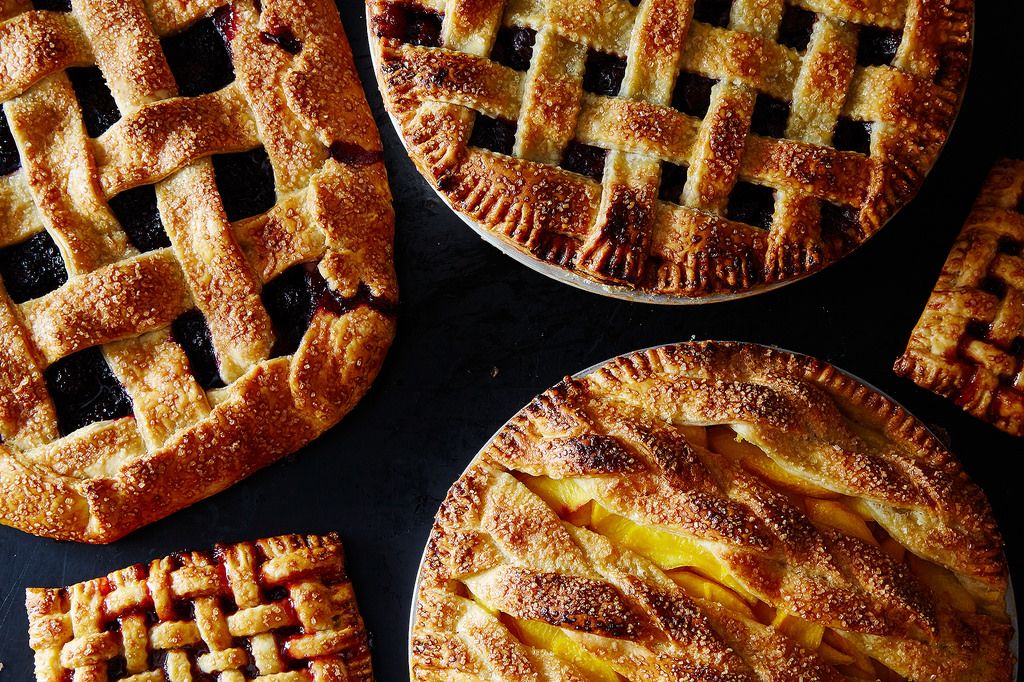
Ready to try your hand at lattice? Here are some of our favorite lattice-top pies:
Photos by James Ransom, with photos by Elizabeth Stark and Yossy Arefi in the final grid
See what other Food52 readers are saying.