As satisfying as a well-written recipe, a smart and thoughtful DIY is our kind of lunch break reading. Bonus points if it's an easy project AND teaches us how to make something beautiful.
Today: Follow along as Laura Kaesshaefer shares how to make summery, nautical trivets—just by knotting rope.
Pretty serving vessels deserve equally lovely pedestals to rest upon. These simple trivets—made simply with sturdy rope from any hardware store—beg to grace your table with any summer spread.
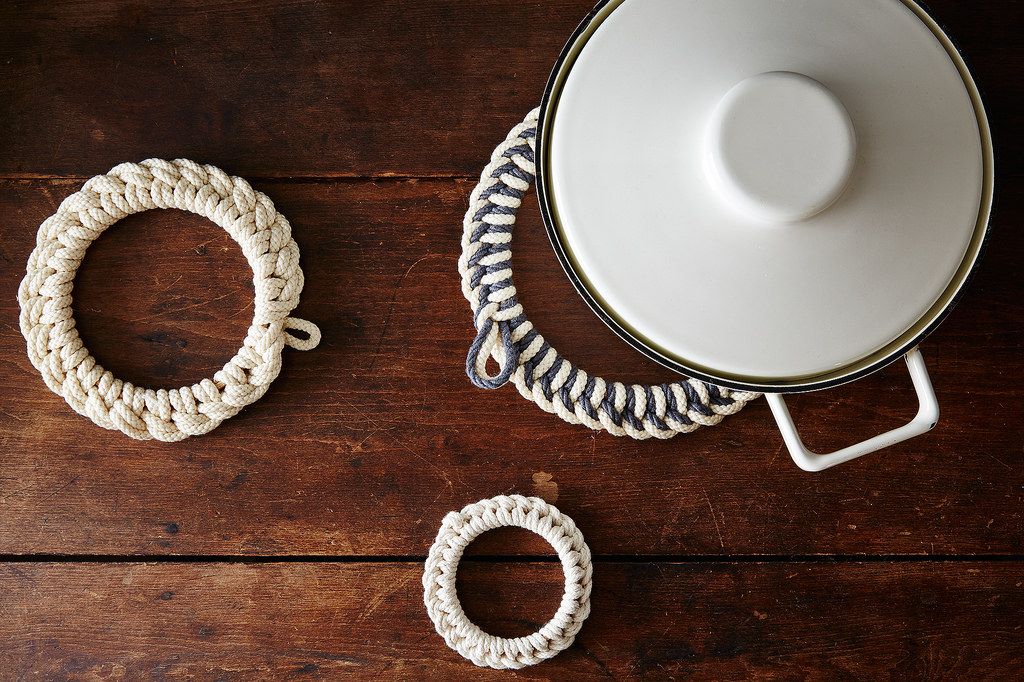
In this project, the inside of an embroidery hoop (the part with no clasp) turns into a trivet when knotted around with rope. If you're feeling wild, mix and match simple rope with metallic or patterned rope, though plain white has a clean look I love. Hoops range in size from 3 to 12 inches in diameter, so you can make little trivets fit for your favorite mug or large ones to prop up a serving dish. End with a loop or simply knot and glue to finish.
Inexpensive to make (at about $10 a pop), lightweight, and very durable, this craft is worth every knot. When you're not using them, hang them on your wall for natural, conversation-sparking decor.
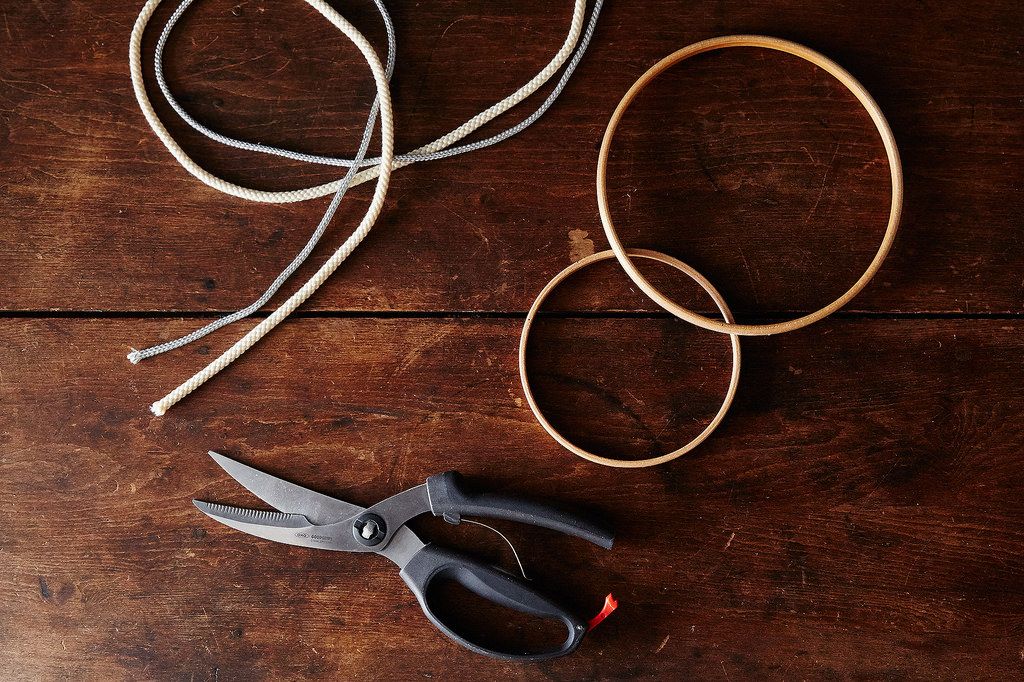
What You'll Need:
Embroidery hoops, inside piece only (I used 3-inch, 5-inch, and 7-inch sizes)
Rope (3 to 4 milimeter thickness works best)
Hot glue gun
Scissors
How to make the trivets:
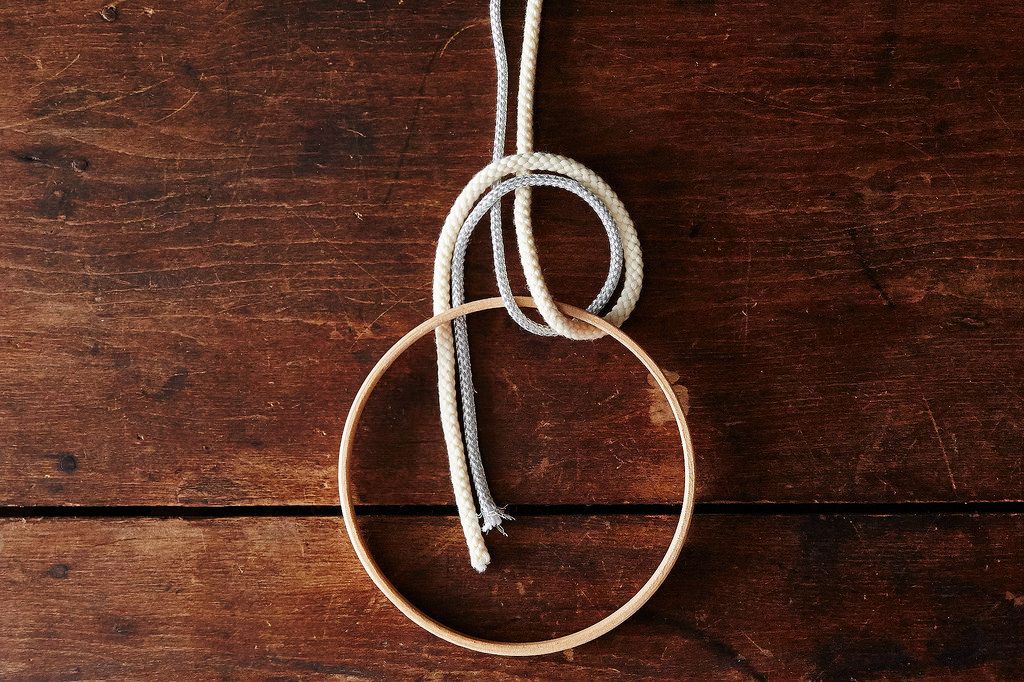
1. Trim rope to size. If you're using a 3-inch hoop, you need two pieces of rope measuring 2 yards each. A 5-inch hoop requires two pieces of rope measuring 3 yards each, and a 7-inch hoop calls for two pieces of rope measuring 5 yards each. Align your two rope pieces so the ends meet, pinching the ends to thread them as one, and set your hoop on a flat surface.
2. Begin knotting the rope. Start the first knot: Keeping one end of the ropes short and secured under the hoop, create a loop with the long end like a lowercase "n" peeking up from the underside of the hoop, bringing the long end towards you through the center of the hoop, and then up through the n-loop you created (left, below). Make it a knot by repeating the motion: Thread the long end around the underside of the hoop, pull it up through the center, and thread it through the new n-loop at the top of the hoop. Lift up the short end and pull the two ends very tight in opposite directions (right, below) and secure a start knot. The hardest part is done!
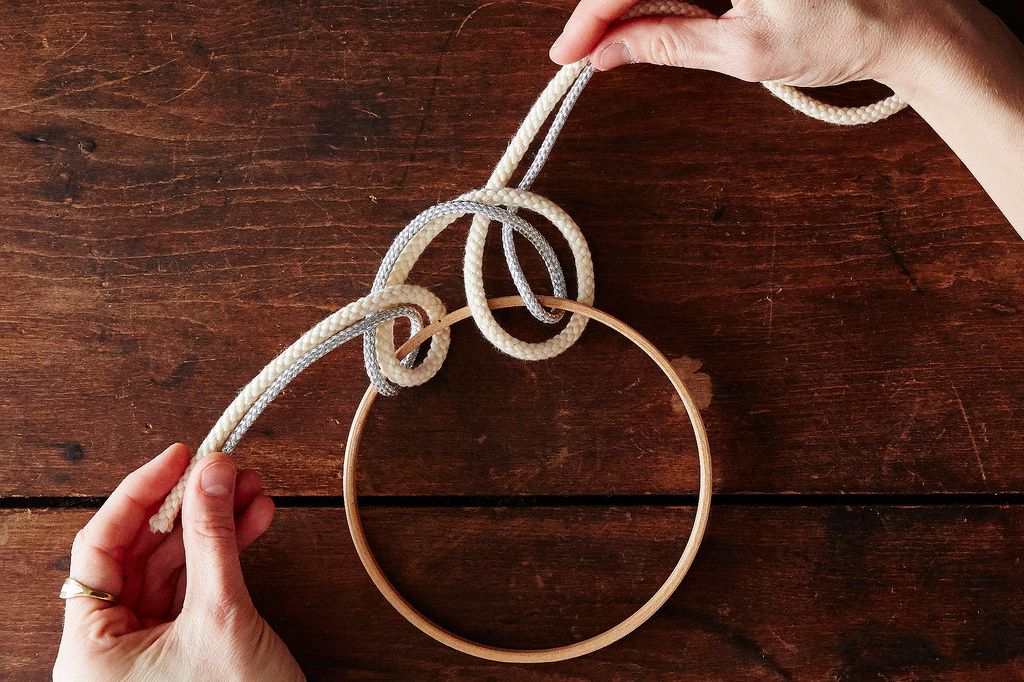
Left: getting started; right: following the first loop with a second, creating a knot when you pull the ends tight.
3. Repeat all the way around the hoop until both ends meet. Once you've got the first knot secure, it's just a matter of creating a loop with the rope end, threading the end up through the center of the hoop and back through the loop created, tightening to secure, and then making another and another. Be careful not to twist the two pieces of rope; you want them side by side in the same order around the hoop so the pattern is consistent.
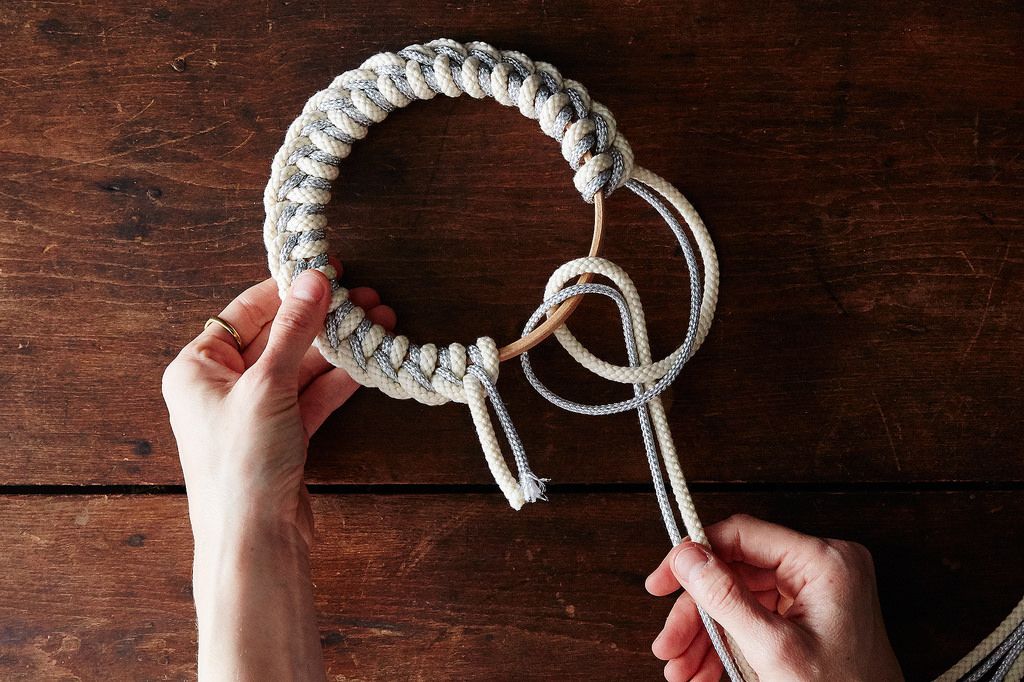
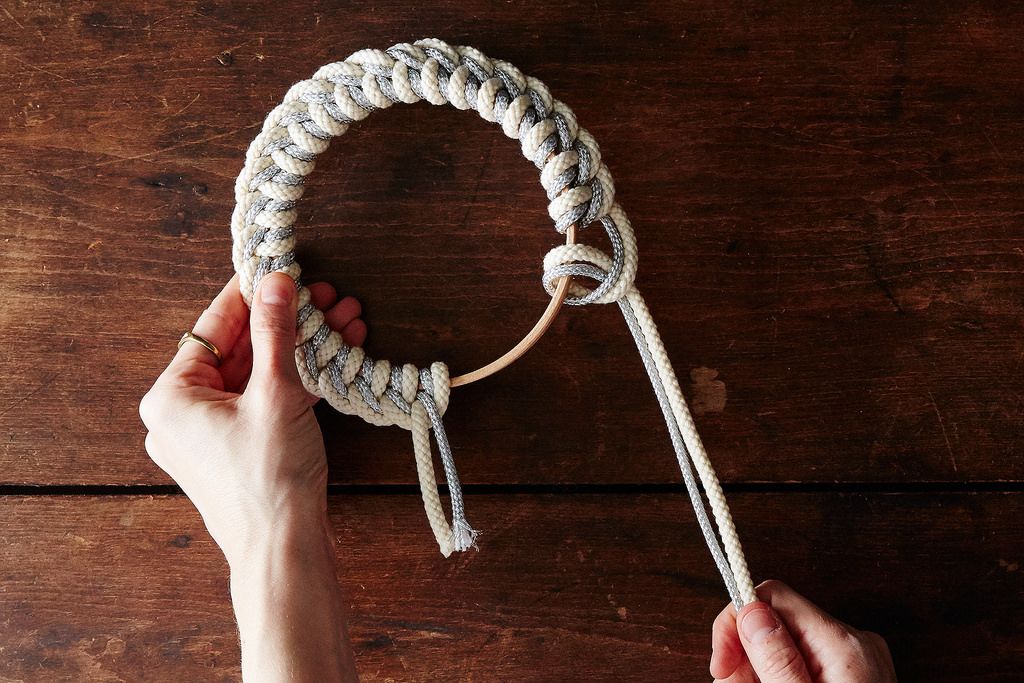
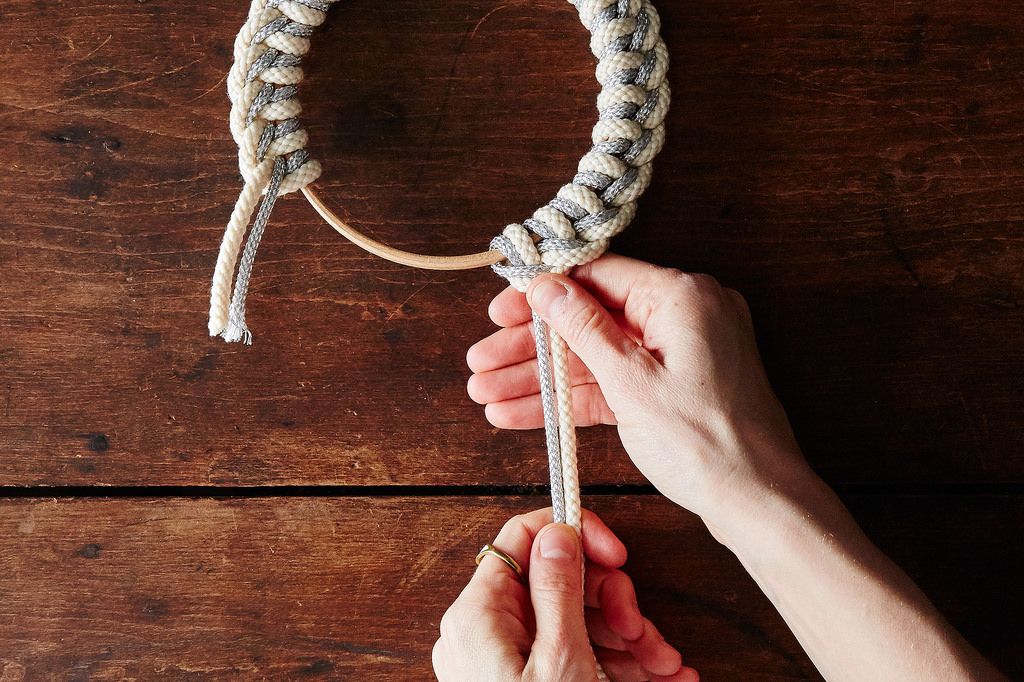
4. Knot ends together. At this point, you can create a final knot, trim the ends as short as possible, and secure it with a dot of hot glue to hide any fraying bits (you'll want your knot to be on the underside of the hoop, so the front is pretty and the knot isn't visible). Alternatively, if the ends of your rope are long enough, you can create a decorative loop by tying a slip knot with one end, trimming excess, and adding a dot of hot glue to secure.
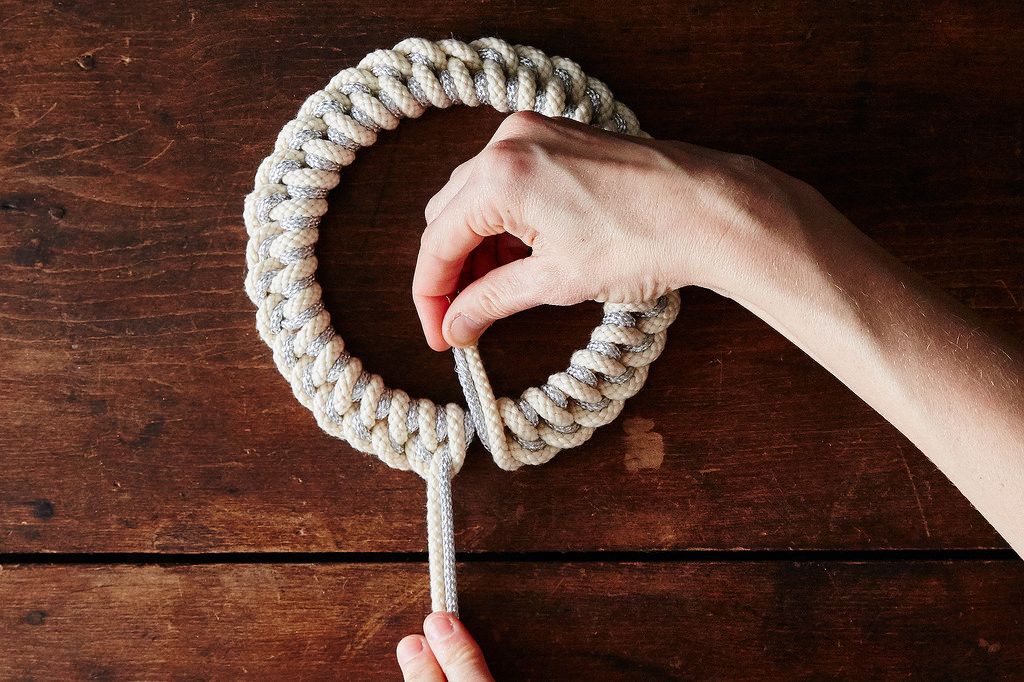
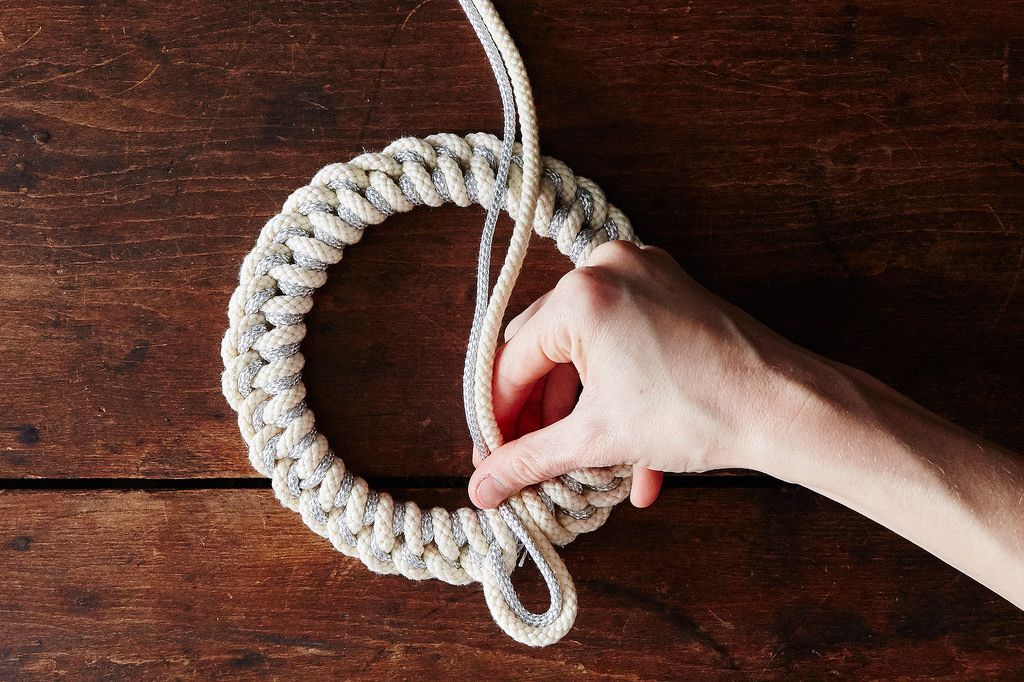
Left: Pull your end piece through the middle and secure on the underside of the hoop with a dot of hot glue; right: Alternatively, form a loop and secure with a dot of glue.
That's it! Use the trivets to serve hot meals right from the pans you cook them in, and when you're done, hang them on a nearby nail for an instant kitchen decoration.
Do you DIY? What tutorials would you like to see here? Let us know in the comments!
Photos by James Ransom
Written by: Laura Kaesshaefer
Popular on Food52
8 Comments
You want between 3-4mm. I'd also recommend a trip to the local hardware store (some carry by the yard on spools vs. buying in bulk). Good luck!
See what other Food52 readers are saying.