It's always more fun to DIY. Every week, we'll spare you a trip to the grocery store and show you how to make small batches of great foods at home.
Today: Heather Hands from Flourishing Foodie is sharing a recipe for a delicious -- and jaw-dropping -- danish braid that will give you a reason to get out of bed in the morning.
During the formative years of my life, when getting out of bed before noon was completely foreign and eating a healthy meal meant adding a slice of tomato on top of my burger, my mother struggled to get me to eat a good breakfast before I ran out to catch the school bus. Since I lacked enthusiasm for breakfast cereal and had no desire for whole grains or yogurt, the only thing that she could conceivably get me to eat was danish. I wasn’t picky in this regard; I enjoyed a whole multitude of flavors, like cherry, raspberry, blueberry, and apple. Back in the sheltered days of my youth, this was eating at its finest.
More: Make every breakfast the breakfast of champions.
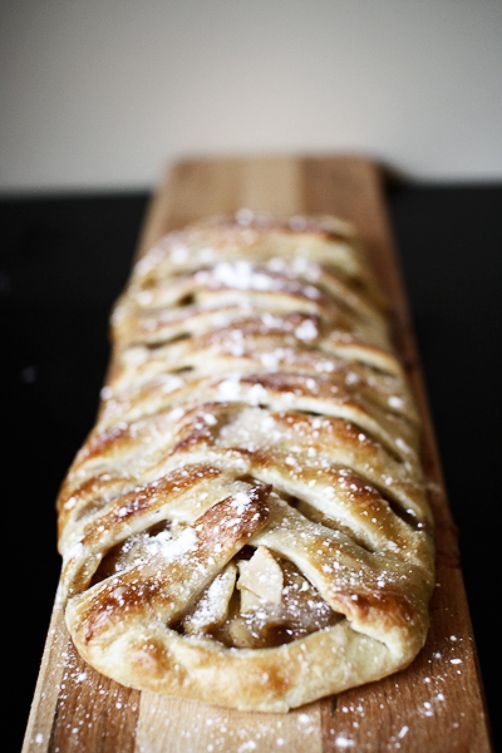
This apple cinnamon danish braid is a tribute to my childhood and the result of a personal quest to make something that was -- and still is -- so close to my heart. The dough needs to be made ahead of time, so a little planning is required, but once you remove that warm cinnamon apple braid from the oven and cover it with a glaze and powdered sugar, you’ll understand why all of the time is worth it. I like to eat my danish with a slice of aged cheddar and a scoop of vanilla ice cream.
Makes 1 danish braid with leftover dough
Crust
2 1/4 teaspoons (1 packet) active dry yeast
1 teaspoon sugar
1/4 cup warm water
1 egg
1/2 cup milk, room temperature
1/4 cup granulated sugar
1 teaspoon salt
2 1/2 cups all-purpose flour
1 cup unsalted butter, chilled and cubed
1 egg white plus 1 teaspoon water
Filling
2 tablespoons unsalted butter
4 apples, peeled and sliced
3/4 cup granulated sugar
1 1/4 tablespoons all-purpose flour
1/2 teaspoon cinnamon
Glaze
1/2 cup powdered sugar
1 to 2 tablespoons milk
1/2 teaspoon vanilla
Powdered sugar for dusting
In a medium bowl, proof the yeast with the warm water and 1 teaspoon of sugar and let stand until it foams. Add the egg, milk, 1/4 cup granulated sugar, and salt to the yeast and stir. Set aside.
Place the flour into a large bowl with the cold butter. Use a pastry cutter to cut the butter into the flour into tiny pieces. (You can also use your food processor for this step.)
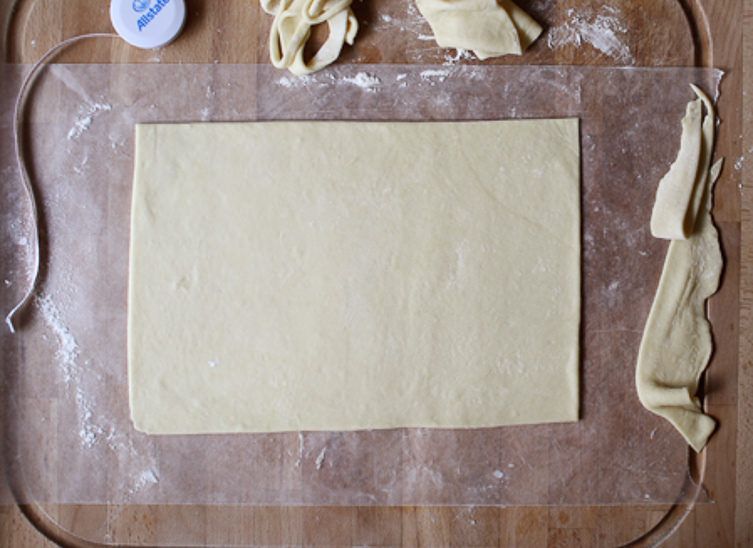
Add the wet ingredients to the flour and butter and combine with a spatula until the dough starts to come together. Place the dough onto a floured work surface and shape into a square using your hands. Roll the dough into a 9 x 13-inch rectangle.
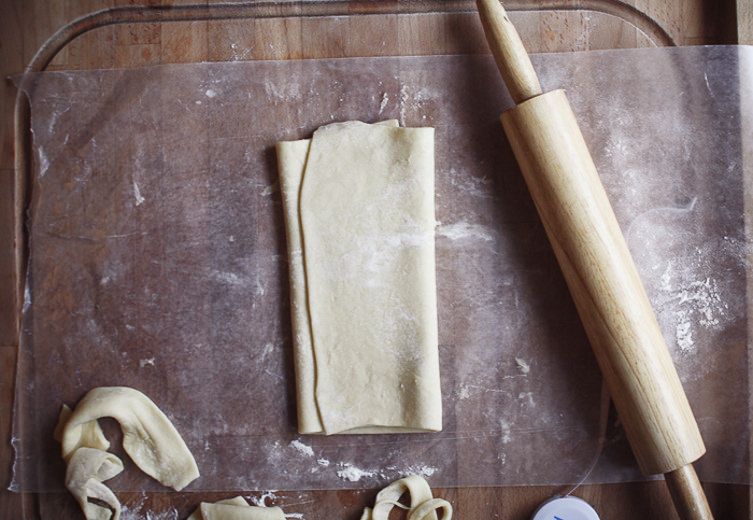
Fold the dough lengthwise into thirds like you’re folding a letter to fit into an envelope. Roll the dough into a 9 x 13-inch rectangle, and then fold into thirds again. Repeat this process twice more, until you’ve done the rolling and folding a total of 3 times. Cut the dough in half, wrap each piece in plastic wrap, and place in the fridge overnight.
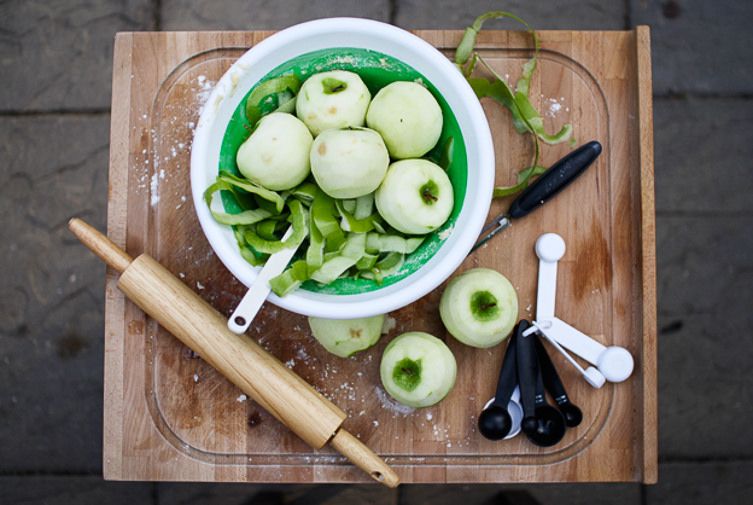
After a good night’s sleep, you’re finally ready to make your Danish braid! Peel, core, and slice the apples. Brown the butter in a large pot or Dutch oven on the stovetop over low heat. Meanwhile, mix the sugar, flour, and cinnamon. Once the butter is brown, add the apples and the cinnamon sugar mixture to the pot and toss to combine. Cook on low heat until all of the liquid has evaporated and the apples are tender. Remove the apples from the heat and let cool for 30 minutes.

Before you begin to make the braid, preheat the oven to 400º F. Remove one piece of dough from the fridge, and save the other for a rainy day. (The dough keeps for one week in the fridge and two months in the freezer.)
On a floured piece of parchment paper, roll out the dough into a 9 x 13-inch rectangle. Place the apples down in the middle of the dough.
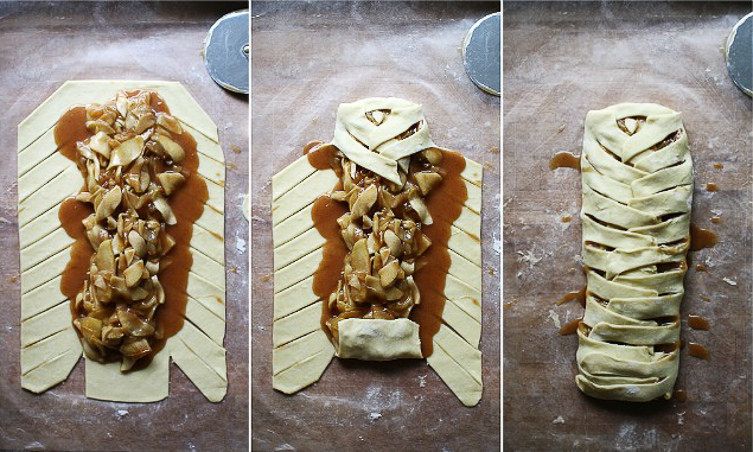
With the dough laid in front of you and the shorter side facing you, make 1-inch diagonal cuts down the left and right sides of the dough -- imagine you are drawing a Christmas tree. Once you have reached the bottom, cut away two triangle pieces, so that the dough now has a tree trunk. Fold the tree trunk flap over the apples, then go back to the top and fold each strip over the apples, alternating from left to right and moving towards the bottom.
Carefully place the parchment paper with the braid on top onto a baking sheet. Brush the top of the pastry with an egg wash of one egg white and a teaspoon of water. Bake for 15 to 20 minutes, or until golden brown on top.
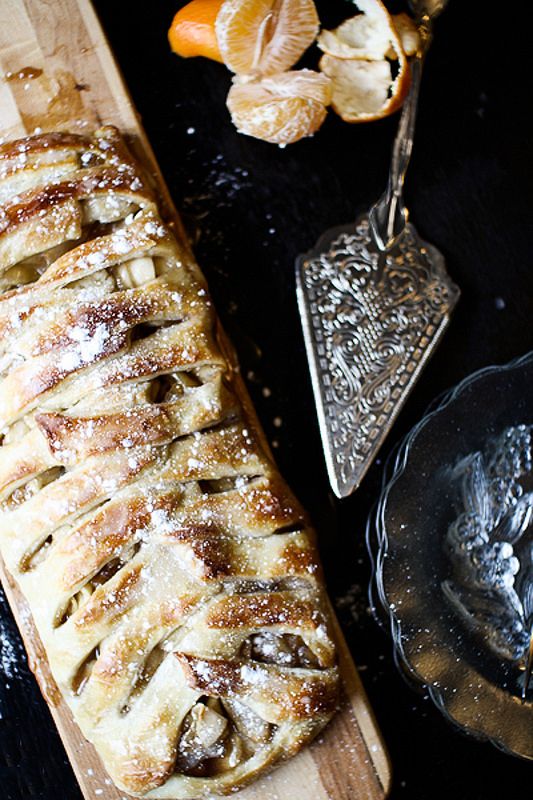
Now, for the icing. In a small bowl, whisk the powdered sugar, 1 tablespoon of milk, and the vanilla. Add an additional tablespoon of milk if the icing is too thick -- it should be pourable, but not so thin that it drips off of the pastry. Drizzle the glaze over the top of the braid and sprinkle with powdered sugar. Serve warm.
If you don't finish the danish braid the day you bake it (which is highly unlikely), store it in the fridge, covered in plastic wrap, for 3 to 4 days. Reheat the danish in the oven or microwave before eating.
See the full recipe (and save and print it) here.
Photos by Heather Hands
See what other Food52 readers are saying.